Project SYP (Shit Your Pants)
The opportunity presented itself, so I went with it.
It all started with a "free" car from S. Stamps. A 1970 Sedan DeVille. There was no plan for the car, figuring it was bought as a parts car. After talking to a few people we decided to do some minor touch-ups. The catch was that since it was a free car, there is no way we could spend any real money on the restoration.
Due to some unforseen problems a new project arose from this current hobby project. Rob decided to drive the Caddy and break it. With the potential for a motor rebuild I decided that it should result in something fun. While tossing around the idea of different motor swaps for the 472, Stampie coincidentally calls me and says "What do you think about putting the 472 into an old Datsun Z car?" Almost instantly I agreed since my mind was headed in the same direction as well, so Project SYP was born.
Thanks Rob

Here's a few shots of the donor car, but there is only one thing that is important from her, that 472.
 |
|||
 |
 |
 |
 |
So the plan starts with the search for a Z car body. Since I may be taking this car back to California I wanted to make sure I would be smog exempt. That means 1975 or prior, so the search begins. A decent looking body with a non-running motor was located for a cheap price. A 1974 Datsun 260Z. So we picked that up on Ebay, now just a matter of getting her back to FL. I enlisted the assistance of Barry, who is always glad to help and partake in my idiotic adventures (thanks Kerin). We got a trailer, hooked it to the truck and hauled ass at 2:30am Saturday night up to NC. Stopping only for food when the truck needed gas we arrived in NC, picked up the car, then turned right around to head back. We arrived back in Jax at about 7:30pm Sunday night. Now that's a lot of hours together in a car non-stop.
 |
 |
 |
 |
 |
 |
 |
 |
 |
And now the stripping begins, not that kind of stripping. We stripped the Cadi and sold practically everything on Ebay (what a great invention). We even sold items we weren't planning on selling. The most shocking item to me is still the hood hinges that went to Norway, but if that's what you need do what you can to get it.
 |
 |
 |
 |
 |
 |
 |
 |
 |
 |
 |
 |
 |
 |
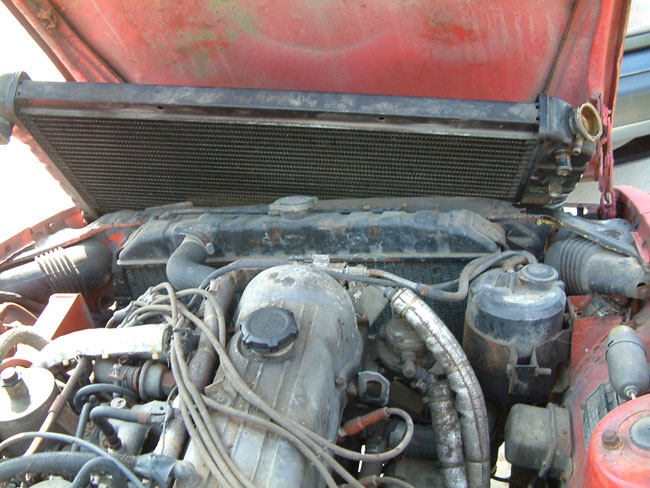
Just a thought, think this radiator from the Cadi
will fit???
If it doesn't, I will make it...time for some creativity and fabrication. But since Stampie has told me an infinite amount of times that he is not a body guy, Barry gets the honor of making her look pretty.
Once completely stripped and everything pulled it was time to call the wrecker. Say bye to the Cadi, gone forever. And on to stripping the Z car and pulling the motor. Thanks to Stampie and Skeeter this got done all in one day.
So where we stand at this point, Cadi gone, both motors pulled, and the Z car ready for prepping. Time to do some body work with Barry. There are a few spots that need the rust cut out and patch panels welded in, removal of the sunroof and a patch panel welded in, and fabrication of a new radiator support to allow us to use the OEM Cadi radiator.
Time for some body work. Remove the fenders and sunroof, cut out the rust, and remove the factory radiator supports. Plans are to fabricate new custom radiator supports in a wider area to allow the use of the OEM Cadi radiator. Prep for welding in patch panels while we're at it.
| Is he working?
|
Maybe thinking??
|
Nope, just taking a cat nap under the Z car.
|
Sunroof rust
|
| More shots of the sunroof rust
|
Close up
|
And another close up
|
Sunroof removal and prep for a patch panel.
|
| Driver side fender rust.
|
Passenger side fender rust.
|
Passenger fender removal
|
Driver side fender removal
|
| Inner fender well rust on passenger side
|
Close up
|
Rust removal
|
Inner fender well rust on driver's side
|
| Rust removal
|
Tweaked radiator support. And it's just not wide enough for the
larger radiator...but we can fix that.
|
Radiator support removed
|
Closer
|
| And when you are all done cutting, clean up is always a good thing.
Learn that Stampie.
|
Thanks Barry
|
Time to finish prepping for engine bay paint, then get a welder over here. Patch panels here we come.
Ok, So now it's time for engine trial fitting.
| Take this motor...
|
...and put it in here?
|
Trans mounts removed
|
Trans mounts removed
|
| Let's put it in
|
Close up
|
Damn oil pan...hits the crossmember
|
|
| Firewall clearance
|
Clearance??? Nope.
|
Damn it.
|
Ok, trial fit number 2!
|
| Still a problem with the oil pan
|
Close up
|
We do have slearance from the steering column
|
Firewall clearance
|
|
|
That was some hard work...someone needs a rest.
|
|
|
Engine cleaning and painting time. Went with Ford dark blue, but shows like Smurf blue in these pictures. The true color is darker, not sure why it looks this way. Waiting on new pictures with hopefully truer color.
|
|
|
|
|
|
|
|
|
|
Ok, time for trial fit number 3. We got a mid sump oil pan from a 425 motor and that should take care of our clearance issues from the front crossmember.
| Motor is in
|
Exhaust manifold is tight on the passenger side.
|
We look a little tight here also.
|
Needs to be deeper.
|
| Stampie's favorite tool, the 2x6.
|
Well, it's in.
|
Motor mount fabrication measurements.
|
|
| A little tight.
|
A little tight, we'll need to get a little more clearance on the passenger
side exhaust manifold.
|
Looks alright.
|
Got clearance
. |
So time for a little welding. Motor mounts are essentially advancement plates that will have holes drilled for the Cadi motor mounts to drop into. A little sheet metal was going to be used to patch the engine bay rust areas and some reinforcement plates welded where there was cracks in the frame rail.
After spending way too much time staring at the NASTY engine bay with bent frame rails and multiple cracks I have come up with a new plan. F**K IT! Yep, that's my new plan. No more thinking this is going to look pretty, and be nice. Instead this will have to serve as a mock up for a real car later. All fabrication will be removeable, shy of the motor mount advancement plates. Once everything is all set to go, this rotten chasis will be traded out for a new, clean, and straight chasis. We will get her running, but then looking for a possible transplant later.
So here's where we stand:
 |
 |
 |
 |
 |
 |
 |
Ok, so the motor mounts didn't work. No templates, not a lot of measuring...and go figure...not a lot of working. So now time for a new plan. We cut out the towers completely and fabbed completely new mount stands welded directly to the frame rails. This also allowed us to get the motor not only exactly where we wanted it, but lower down as well. One little hitch as always with us ass backwards, no forethought builders. When we mocked up the location for the mounts forgot that the steering column was out and we just happened to put the mounts where the knuckle from the steering column hits within an 1/8 inch. Nothing ever done easy. So a little modification of the cadi motor mount and we're back in business. And the brake lines are back in the car as well.
| So Rob came back to help...sort of | And Stampie is always good for some help as well. | No more Smurf Blue |  |
 |
 |
Pretty new master cylinder and reservoirs | New motor mount plates welded in place |
We'll keep you posted as we progress.